The other jQuery methods for wrapping elements are .wrapAll() and .wrapInner(). See http://docs.jquery.com/Manipulation/wrapAll and http://docs.jquery.com/Manipulation/wrapInner for more information.
Copying elements
So far in this article we have
inserted newly created elements, moved elements from one location in the
document to another, and wrapped new elements around existing ones.
Sometimes, though, we may want to copy elements. For example, a
navigation menu that appears in the page's header could be copied and
placed in the footer as well. In fact, whenever elements can be copied
to enhance a page visually, it's a good opportunity to use a script.
After all, why write something twice and double our chance of error when
we can write it once and let jQuery do the heavy lifting?
For copying elements, jQuery's .clone()
method is just what we need; it takes any set of matched elements and
creates a copy of them for later use. As with the element creation
process we explored earlier in this article, the copied elements will
not appear in the document until we apply one of the insertion methods.
For example, the following line creates a copy of the first paragraph
inside <div class="chapter">:
$('div.chapter p:eq(0)').clone();
So far, the content on the page hasn't changed:
To continue the example, we can make the cloned paragraph appear before<div class="chapter">:
$('div.chapter p:eq(0)').clone().insertBefore('div.chapter');
Now the first paragraph appears twice, and because the first instance of it is no longer inside<div class="chapter">, it does not retain the styles associated with the div (most noticeably, the width):
So, using an analogy that most people should be familiar with, .clone() is to the insertion methods as copy is to paste.
Clone with events
The .clone() method by default does not copy any events
that are bound to the matching element or any of its descendants.
However, it can take a single Boolean parameter that, when set to true, clones events as well: .clone(true). This convenient event cloning allows us to avoid having to deal with manually rebinding events.
Cloning for pull quotes
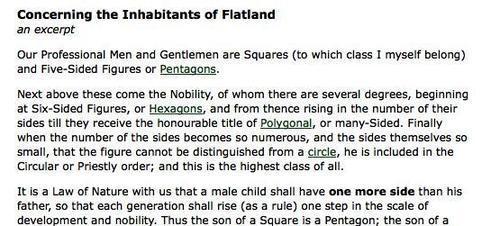
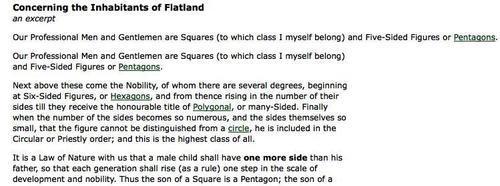
Many websites, like their print counterparts, use pull quotes to emphasize small portions of text and attract the reader's eye. We can easily accomplish this embellishment with the .clone() method. First, let's take another look at the third paragraph of our example text:
<p>
<span class="pull-quote">It is a Law of Nature
<span class="drop">with us</span> that a male child shall
have <strong>one more side</strong> than his father</span>,
so that each generation shall rise (as a rule) one step in
the scale of development and nobility. Thus the son of a
Square is a Pentagon; the son of a Pentagon, a Hexagon; and
so on.
</p>
Notice that the paragraph begins with<span class="pull-quote">. This is the class we will be targeting for cloning. Once the copied text inside that<span> is pasted into another place, we need to modify its style properties to set it apart from the rest of the text.
A CSS diversion
To accomplish this type of styling, we'll add a pulled class to the copied<span> and give the class the following style rule in the stylesheet:
.pulled {
elementsstyle rules, applyingbackground: #e5e5e5;
position: absolute;
width: 145px;
top: -20px;
right: -180px;
padding: 12px 5px 12px 10px;
font: italic 1.4em "Times New Roman", Times, serif;
}
The pull quote now gets
a light gray background, some padding, and a different font. Most
important, it's absolutely positioned, 20 pixels above and 20 pixels to
the right of the nearest (absolute or relative) positioned ancestor in the DOM. If no ancestor has positioning (other than static) applied, the pull quote will be positioned relative to the document<body>. Because of this, we need to make sure in the jQuery code that the cloned pull quote's parent element has position:relative set.
While the top
positioning is fairly intuitive, it may not be clear at first how the
pull quote box will be located 20 pixels to the left of its positioned
parent. We derive the number first from the total width of the
pull-quote box, which is the value of the width property plus the left
and right padding, or 145 px + 5 px + 10 px, or 160 px. We then set the right
property of the pull quote. A value of 0 would align the pull quote's
right side with that of its parent. Therefore, to place its left side 20
px to the right of the parent, we need to move it in a negative
direction 20 pixels more than its total width, or -180 px.
Back to the code
Now we can get into the jQuery. Let's start with a selector expression for all of the<span class="pull-quote"> elements, and attach an .each() method so that we can perform multiple actions as we iterate through them:
$(document).ready(function() {
$('span.pull-quote').each(function(index) {
//...
});
});
Next, we find the parent paragraph of each pull quote and apply the CSS position property:
$(document).ready(function() {
$('span.pull-quote').each(function(index) {
var $parentParagraph = $(this).parent('p');
$parentParagraph.css('position', 'relative');

});
});
Once again, we store any selector that we'll be using more than once in a variable to improve performance and readability.
We can be sure now that the CSS is all set and ready for the pull quote. At this point we can clone each<span>, add the pulled class to the copy, and insert it into the beginning of the paragraph:
$(document).ready(function() {
$('span.pull-quote').each(function(index) {
var $parentParagraph = $(this).parent('p');
$parentParagraph.css('position', 'relative');
$(this).clone()
.addClass('pulled')
.prependTo($parentParagraph);

});
});
Because we're using absolute
positioning for the pull quote, the placement of it within the paragraph
is irrelevant. As long as it remains inside the paragraph, it will be
positioned in relation to the top and right of the paragraph, based on
our CSS rules. If, however, we wanted to apply a float to the pull quote instead, its placement within the paragraph would affect its vertical position.
The paragraph, together with its pull quote, now looks like this:
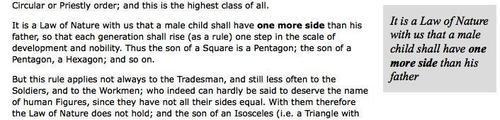
This is a good start, but pull quotes typically do not retain font formatting as this one does with the bold one more side text. What we want is the text of<span class="pull-quote">, stripped of any<strong>, <em>, <a href>
or other inline tags. Additionally, it would be nice to be able to
modify the pull quote a bit, dropping some words and replacing them with
ellipses. For this, we have wrapped a few words of text in the example
in a<span> tag:<span class="drop">with us</span>.
We'll apply the ellipsis first, and then replace all of the pull-quote HTML with a stripped, text-only version:
$(document).ready(function() {
$('span.pull-quote').each(function(index) {
var $parentParagraph = $(this).parent('p');
$parentParagraph.css('position', 'relative');
var $clonedCopy = $(this).clone();

$clonedCopy
.addClass('pulled')
.find('span.drop')
.html('…')
.end()
.prependTo($parentParagraph);
var clonedText = $clonedCopy.text();
$clonedCopy.html(clonedText);

});
});
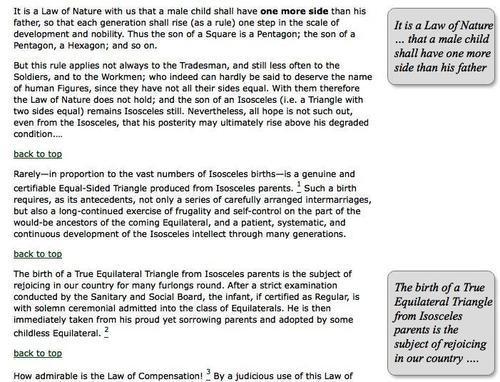
At the end, we set one more variable, clonedText,
to the text-only contents of the copy; then we use these text-only
contents as a replacement for the HTML of the copy. Now, the pull quote
looks like this:

Evidently, another<span class="pull-quote"> has been added to a later paragraph to ensure that the code works for multiple elements.
Prettifying the pull quotes
The pull quotes are now working as expected, with child elements stripped and ellipses added where text should be dropped.
Since one of the goals is to
add visual appeal, though, we would do well to give the pull quotes
rounded corners with drop shadows. However, the variable height of the
pull-quote boxes is problematic because we'll need to apply two
background images to a single element, which is impossible for every
browser at the moment except the most recent builds of Safari.
To overcome this limitation, we can wrap another<div> around the pull quotes:
$(document).ready(function() {
$('span.pull-quote').each(function(index) {
var $parentParagraph = $(this).parent('p');
$parentParagraph.css('position', 'relative');
var $clonedCopy = $(this).clone();
$clonedCopy
.addClass('pulled')
.find('span.drop')
.html('…')
.end()
.prependTo($parentParagraph)
.wrap('<div class="pulled-wrapper"></div>');

var clonedText = $clonedCopy.text();
$clonedCopy.html(clonedText);
});
});
We also need to modify the CSS, of course, to account for the new<div> and the two background images:
.pulled-wrapper {
background: url(pq-top.jpg) no-repeat left top;
position: absolute;
width: 160px;
right: -180px;
padding-top: 18px;
}
.pulled {
background: url(pq-bottom.jpg) no-repeat left bottom;
position: relative;
display: block;
width: 140px;
padding: 0 10px 24px 10px;
font: italic 1.4em "Times New Roman", Times, serif;
}
Here, some of the rules formerly applied to<span class="pulled"> are applied to<div class="pulled-wrapper"> instead. A couple of width and padding adjustments take into account the design of the background image borders, and the .pulled rule has its position and display properties modified in order to appear correctly for all browsers.
Here is one final look at the newly primped pull quotes in their native habitat:
DOM manipulation methods in a nutshell
The extensive DOM
manipulation methods that jQuery provides vary according to their task
and their location. The following outline can serve as a reminder of
which methods we can use to accomplish any of these tasks, just about
anywhere.
1. To create new elements from HTML, user the $() factory function.
2. To insert new element(s) inside every matched element, use:
.append()
.appendTo()
.prepend()
.prependTo()
3. To insert new element(s) adjacent to every matched element, use:
.after()
.insertAfter()
.before()
.insertBefore()
4. To insert new element(s) around every matched element, use:
.wrap()
.wrapAll()
.wrapInner()
5. To replace every matched element with new element(s) or text, use:
.html()
.text()
.replaceAll()
.replaceWith()
6. To remove element(s) inside every matched element, use:
7. To remove every matched element and descendants from the document without actually deleting them, use: